Showing posts with label Azure. Show all posts

Sunday, 8 November 2020

Tip for capturing custom Windows 10 multi-session image for WVD

Azure gives us a nifty feature for capturing images from virtual machines. The high-level process is as follows:
  • Create the VM with Windows 10 multi-session
  • Install apps and customize
  • Snapshot the VM for future use
  • Sysprep and generalize the image
  • Capture the image
  • The image is then available in the gallery for creating WVD host pools

You'll find the capture feature in the Overview of the VM. Note that the capture renders the VM unusable and you can check a box to automatically delete the VM. If you want to revert you will have to create a new VM and apply the snapshot.

That all sounds great so what is the problem? The problem is actually a well known issue with capturing custom Windows 10 images. If you allow the reference computer (often a Hyper-V VM) to connect to the internet then the device can connect to the Windows 10 Store and update the built-in apps. This can cause Sysprep to fail. 


The easy way around that is to remove the NIC from the VM so that this cannot happen. 

However what can we do in Azure? You can't remove the NIC as you wouldn't be able to access the VM in that case. 


This is the Sysprep error I was seeing on my Azure reference computer. 

SYSPRP Failed to remove staged package Microsoft.PPIProjection_10.0.18362.449_neutral_neutral_cw5n1h2txyewy: 0x80070002.[gle=0x00000002]

I needed to prevent internet access but still maintain network access. DNS to the rescue. Normally a VM inherits DNS settings from the virtual network. However you can configure a custom DNS server for any VM. If you configure a DNS server that doesn't exist then the VM will not be able to access the internet but you still retain network access.

Click on the network interface for the VM.
 

You'll find that in the Networking blade.


Configure the dummy DNS server. Remember you have to be quick. Do this as soon as the VM is created. This worked for me and I was able to successfully syprep and capture the image. 

I hope this helps. Until next time........

Friday, 24 April 2020

Windows Virtual Desktop - AD join account requirements

It took me a while to figure out why my customer deployment of a WVD host pool would not work. Everything looked normal to me. The problem was that the VMs could be created but could not be joined to the domain (remember all Windows Virtual Desktops must be domain joined). Eventually I tracked down the problem to the domain-join account. This made me look more closely at the requirements for this account, so here we go.

What is the WVD domain-join account? 

This account has to be entered during the provisioning of a WVD host pool.


One of the required items is the AD domain join UPN. This is the account that will be used to join the VMs to your on-premises Active Directory. If you look at the tooltip you will see the following text:

"UPN of an Active Directory user that has permissions and will be used to join the virtual machines to your domain. For example, vmjoiner@contoso.com. A local user account with this name will be created on each virtual machine. Do not enter a user who has MFA enabled. See https://aka.ms/vmUsernameReq for invalid usernames".

There are a few takeways here.
  • the account must have permissions to join AD (this is obvious)
  • a local account is actually created on each VM
  • the account cannot be MFA enabled
  • take note of the URL for invalid usernames (see next section)

Requirement #1: MFA cannot be enabled on the WVD AD join account. 

(tip: you should create a service account for this).

Invalid usernames

The official WVD docs don't tell us much about the requirements for this account.

"Enter the user principal name and password. This account must be the domain account that will join the virtual machines to the Active Directory domain. This same username and password will be created on the virtual machines as a local account. You can reset these local accounts later".

However there are some specific requirements around invalid usernames, which are actually enforced by Azure (this was my problem). You can find them in the Azure VMs FAQ docs 


These are the blacklisted usernames. There are a number of popular contenders in there.

Requirement #2: the username cannot be one of the blacklisted usernames.

Password

You will find the password requirements in the same doc


Requirement #3: in general the password must be complex with a minimum of 12 characters.

I hope this helps you when implementing WVD. Until next time.....

Monday, 23 March 2020

Creating a Windows Virtual Desktop host pool and MFA

For now you can't. It's not supported to use an MFA enabled account when creating a WVD host pool. That's a little tricky. Most production accounts should at this stage be MFA enabled. So what do we do? It's easy, we can use an Azure AD service principal.

What is that about? 

It's not a user account. Rather, an Azure service principal is a security identity used by user-created apps, services, and automation tools to access specific Azure resources.

So how do we use it?

These are the steps we will follow:
  • Create a service principal in Azure Active Directory.
  • Create a role assignment in Windows Virtual Desktop.
  • Sign in to Windows Virtual Desktop by using the service principal.
  • Create the WVD host pool.
The first steps involve using PowerShell.
  • First install the Azure AD and WVD PoSH modules.
Install-Module AzureAD

Install-Module -Name Microsoft.RDInfra.RDPowerShell

Import-Module -Name Microsoft.RDInfra.RDPowerShell
  • Next create the service principal in Azure AD.
Import-Module AzureAD
$aadContext = Connect-AzureAD
$svcPrincipal = New-AzureADApplication -AvailableToOtherTenants $true -DisplayName "Windows Virtual Desktop Svc Principal"
$svcPrincipalCreds = New-AzureADApplicationPasswordCredential -ObjectId $svcPrincipal.ObjectId

  • Now that you've created the service principal you'll need some details before you can continue.
Check the service principal password (you need to do this now as you won't be able to retrieve it once you close this PoSH session).

$svcPrincipalCreds.Value (this will be Result 1)

Tenant ID:

$aadContext.TenantId.Guid (Result 2)

Application ID:

$svcPrincipal.AppId (Result 3)
  • Now create a role assignment for the service principal in Azure AD
First get your tenant name

Add-RdsAccount -DeploymentUrl "https://rdbroker.wvd.microsoft.com"
Get-RdsTenant

Add the role assignment

$myTenantName = "<Windows Virtual Desktop Tenant Name>"
New-RdsRoleAssignment -RoleDefinitionName "RDS Owner" -ApplicationId $svcPrincipal.AppId -TenantName $myTenantName

Test the service principal by signing into Azure AD

$creds = New-Object System.Management.Automation.PSCredential($svcPrincipal.AppId, (ConvertTo-SecureString $svcPrincipalCreds.Value -AsPlainText -Force))
Add-RdsAccount -DeploymentUrl "https://rdbroker.wvd.microsoft.com" -Credential $creds -ServicePrincipal -AadTenantId $aadContext.TenantId.Guid
  • Finally we can use the service principal to create the WVD host pool
On the Windows Virtual Desktop information page, choose Service principal as the Windows Virtual Desktop RDS owner.


Enter the results from the previous PoSH cmdlets and continue to create the WVD host pool.

I hope this helps. Until next time....

Sunday, 29 December 2019

Deploy management tool for Windows Virtual Desktop host pools

I've been test driving Windows Virtual Desktop recently and I'm impressed with what I've seen. I've blogged about my experience here. I have noticed however that I can create a host pool in the Azure Portal but I can't see it or manage it afterwards in the portal. 


I can see the VMs but not the host pool. 


Try it yourself. Have a look at All Resources. You won't find anything related to Windows Virtual Desktop or host pools.

So how do we manage WVD? We have two options. We can manage the host pool using PowerShell (see here for a full list of cmdlets) or we can create our own management user interface. It's very easy. Microsoft have already provided a sample, which is an Azure Resource Manager template. Admins are encouraged to customize to suit their requirements. 

Here's how it works.

Navigate to the ARM template on GitHub


Scroll down and select Deploy to Azure. You'll need permissions to create resources in your Azure subscription.


Enter the parameters (subscription, resource group, admin account). Give the application a unique name.


The deployment is under way and you can see the resources being created.


The deployment has completed. Now we need to launch the tool.


First, ensure that Users can consent to apps accessing company data on their behalf.


Where do we get the URL for the tool? Have a look in All Resources and find the application that you have just created.


You'll find the URL on the top right corner. It's of the format https://yourappname.azurewebsites.net. Browse to the URL and sign in with the host pool owner.


Grant permission to access WVD.


Choose your Tenant Group from the drop-down arrow and you have access to the host pool.


You can now manage the host pool. See how you can add or drain a host and see details of user sessions.

I hope you find this useful. Until next time.


Thursday, 28 November 2019

Test driving Windows Virtual Desktop

This week I've been working with Windows Virtual Desktop (WVD) for the first time. Microsoft announced General Availability in September and I'm just getting to it now. I think it's great. What's not to like? We can now deploy a Remote Desktop solution in Azure without having to worry about the underlying infrastructure (RD Gateway, an RD Connection Broker, and RD Web Access).

I've captured my experience in this blog post. It's pretty long so I've divided it into the following sections to make it easier to read.
  • What is Microsoft Windows Virtual Desktop?
  • Is it the same as Microsoft Managed Desktop?
  • Windows Virtual Desktop prerequisites
  • Setting up Windows Virtual Desktop
  • Working with Windows Virtual Desktop
  • Advanced configuration (with RemoteApp, FSLogix containers and MSIX App Attach)

What is Windows Virtual Desktop?

WVD allows you to deploy and scale virtualized Windows desktops and apps on Azure. It can be deployed in minutes and offers simplified management, multi-session Windows 10 and optimizations for Office 365 ProPlus. We can deploy VMs with Windows 10 or Windows Server 2016. We can also use our own custom Windows 7 images. As an added bonus this includes free extended support for Windows 7 (extended security updates for three years). That's a no-brainer.

Is this the same as Microsoft Managed Desktop?

No, Microsoft Managed Desktops is something different. This is also a cloud service but Microsoft will manage Windows 10 and Office 365 ProPlus on your hardware. Obviously Microsoft will only support this on a specific list of devices.

This service includes the management of:
  • hardware (once it's on the approved list and registered)
  • software updates
  • Office 365 ProPlus and LOB apps as appropriate
  • end user device deployment
  • security monitoring and response

OK, so back to WVD.

Windows Virtual Desktop Prerequisites

There are some requirements before you can get started.
  • Licenses - you should consult the official docs  but I have Microsoft 365 E3 for testing.
  • Obviously we need an Azure subscription - this will cost you money (but not too much).
  • User accounts - you'll need to nominate a WVD Tenant Creator and some test host pool users.
  • You need to decide what directory services you will use to support your infrastructure. You can use Azure AD, DC hosted in Azure or a DC hosted on premises with a VPN to Azure. The Azure VMs that you create can be AD-joined or hybrid AD-joined (not Azure AD-joined.
  • Azure network - you need to have a virtual network in Azure. Remember you don't configure DHCP in Azure virtual networks. IP addressing is dynamic based on the assigned subnet. 

  • I'm using a DC hosted in Azure so I configured a static DNS record for the DC in the properties of the virtual network. This way my VMs will be able to join the domain.
  • Download and install the Windows Virtual Desktop PowerShell module. Launch PowerShell as administrator and run:
         Install-Module -Name Microsoft.RDInfra.RDPowerShell
  •  Then import the module:
          Import-Module -Name Microsoft.RDInfra.RDPowerShell

Setting up Windows Virtual Desktop

Now let's get started setting up the environment. The first thing we need to do is to allow Windows Virtual Desktop services to access the Azure AD tenant. For this we'll need the tenant ID (also referred to as Directory ID).


We can get the Directory ID in the properties of Azure Active Directory. Copy it be clicking on the blue box to the right. You'll need this a couple of times during this process.


Now navigate to https://rdweb.wvd.microsoft.com (this is Windows Virtual Desktop services). Add your tenant ID and click Submit for the Server App.


Accept that you are granting permissions to WVD.


This was successful.


Repeat the process for the client app.


Accept the permissions.

Enjoy the success. Now that we've granted access to Azure AD we need to grant permissions to a user to create a Windows Virtual Desktop tenant. Essentially we'll assign the "TenantCreator" role to a user account.

We do this in the Azure Portal.


Navigate to Azure Active Directory and select Enterprise Applications.


Select Windows Virtual Desktop and choose Users and Groups.


Select Add User and add the lucky user who will create the WVD tenant. I've chosen Fred. See that he is now a TenantCreator.

Now we'll create the WVD tenant. Remember we copied the tenant ID earlier (aka Directory ID). We're going to need it again. We'll also need the Azure Subscription ID.


It's easy to find. Navigate to your Subscriptions using the search.


You'll find the subscription ID. Now's let's create the WVD tenant. We do that using PoSH. Sign in to Windows Virtual Desktop by using the TenantCreator user account with this cmdlet:

Add-RdsAccount -DeploymentUrl "https://rdbroker.wvd.microsoft.com"

Create a new Windows Virtual Desktop tenant associated with the Azure Active Directory tenant (you'll choose a tenant name and replace the bracketed values with your tenant ID and subscription ID):

New-RdsTenant -Name <TenantName> -AadTenantId <DirectoryID> -AzureSubscriptionId <SubscriptionID>


The WVD tenant has been created. Now we'll deploy a host pool of virtual desktops. Sign into the Azure Portal and select Create a Resource.


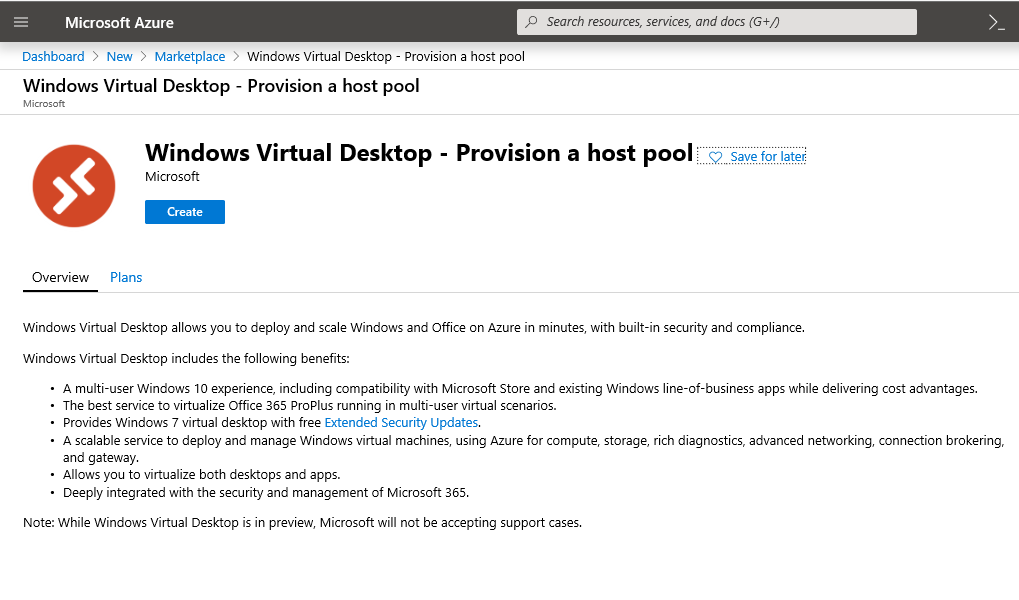
Search for Windows Virtual Desktop and select Windows Virtual Desktop - Provision a host pool.


Choose to Create a host pool. There are four pages of details to configure.


The first page has some basics.
  • Choose the subscription that you want to use (there will be a cost).
  • Select a Resource Group. It needs to be empty so you'll probably create a new one here.
  • Select your region.
  • Enter a name for the host pool.
  • Choose the desktop type. Personal is where every user has a dedicated VM. I've chosen pooled.
  • Configure the users that will log into these VMs (comma-separated list). Note that you'll also need to enter the TenantCreator here if he will need access. It is not automatic.


The next page is for our expected usage. This determines how many VMs will be deployed. Click Change Size if you want to change any VM details. I'm conscious of cost in my lab so I've done that. Also enter a prefix for the names of the VMs


The third page allows you to configure the VMs. Choose the following:
  • Image Operating System - I've chosen Windows 10 Enterprise multi-session with Office 365 ProPlus.
  • Disk type - I've chosen Premium SSDs for performance.
  • Domain join account and password - the account must already be configured on the domain. This requires password complexity so be careful here.
  • Domain and domain OU - remember the VMs must be able to find the DC
  • Virtual network and subnet - make sure your DNS configuration is in place.

The final page asks for the WVD tenant details. Enter the tenant name and the owner account details. That's Fred, who created the tenant.


Finally you're asked to review your configuration and then Create the host pool.


The deployment is underway. You can see the detailed steps.

The deployment has completed.


The VMs have been created......


…..and joined to the domain.

Working with Windows Virtual Desktop

There are two ways to access the WVD pool from a desktop.
  • Remote Desktop client
  • Browser (HTML5 client)
I'm going with the full client option. You can download from here


It's an MSI installer so just run and install as normal.


On the first launch you have to Subscribe to WVD.


Sign in as a permitted user.


Looks like we're in business.


I can see my WVD host pool......


….and I've signed into one of my VMs.


I can now work normally. I can browse to fileshares on one of my servers hosted in Azure.

Advanced WVD configuration

So what's next? We can get lot more advanced with WVD and I will when I have more time.

Management Tool

You cannot manage WVD host pools in the Azure portal. You can manage the pool using PowerShell or you can create you own management UI.

http://gerryhampsoncm.blogspot.com/2019/12/deploy-management-tool-for-windows.html

RemoteApp


We can create a RemoteApp app group and publish individual Start menu apps.

FSLogix profile containers

The WVD service offers FSLogix profile containers as the recommended user profile solution. 

http://gerryhampsoncm.blogspot.com/2019/12/use-fslogix-containers-for-windows.html

MSIX App Attach

MSIX app attach is where the application (stored in MSIX format on a central location) is attached to the operating system. After attaching, applications look and feel as locally installed to the user as well as the operating system.

That's it for now. I've enjoyed test driving Windows Virtual desktop. You can get more information in the official docs

Until next time.......