Back to Secunia menu
In order to have an effective third party patching solution you need to know what third party applications are on your computers. There are a number of ways to collect this inventory.
ConfigMgr Software Inventory
I'm not a real fan of software inventory in ConfigMgr. It doesn't gather the information from "Programs and Features" on your devices (ironically that is done by hardware inventory). Rather it just collects a lot of information about files on your systems. You have to configure the file extensions in advance. For me it causes a lot of unnecessary overhead for very little gain.
If you wish to use this method you must add the following file extensions to ConfigMgr software inventory.
*.exe
*.dll
*.ocx
Also the ConfigMgr server must have Internet access and be able to communicate with the Secunia cloud service using port 443.
Remote Scanning
This is OK for smaller networks but doesn't scale well to enterprises.
CSI Agent
This method requires that a small lightweight agent is installed on each computer. All computers will need Internet access and be able to communicate with the Secunia cloud service using port 443.This is the method we will use for this blog.
In the CSI Portal navigate to Patching > Agent Deployment.
Select "Create CSI Agent Package".
The Package Configuration wizard is launched. Enter a suitable name.
Make sure that you check the "Use Secunia Custom Naming" box. All third party updates will then have the Secunia name. You will be able to filter by Secunia and you will never exceed the vendor limit of your Software Update Point.
Choose the defaults. Remember that we will be publishing the package to WSUS.
The package has been created.....
.....and is available.
Now we must carry out some preparatory work in ConfigMgr. Open the Software Update Point properties.
Select "Create all WSUS reporting events".
Ensure "Security Updates" is selected.
For products note that we can currently only see Local Publisher and Microsoft.
Manually synchronize the updates.
Almost immediately you will see Secunia as an available option. Check the box.
In time the package will be available in ConfigMgr. This can take a while (almost an hour in this example).
Right click and choose to deploy the package.
Enter a suitable name for the deployment and choose the collection of devices.
This is a required deployment.
Choose as soon as possible.
A reboot is not required.
Select a deployment package.
Click Next to create the deployment.
Now you could wait until the normal updates cycles run. However I'm impatient so I've used the Now Micro Right click tools to immediately run the Software Updates Deployment Evaluation Cycle and the Machine Policy Retrieval and Evaluation Cycle. The agent now installs on the computers.
You can see scan results being reported in the CSI portal.
Detailed scan results.
See the insecure third party applications.
See the top 10 offenders. We will update these applications in the next blog in the series.
Until next time.....
Back to Secunia menu
This is the latest blog post in my "Third party patching with Secunia CSI" series. In the previous post we started using the CSI portal but now we will look at the first portal configurations.
(As before you must use Internet Explorer to use the CSI portal. You must run IE as Administrator in order to complete the WSUS configuration).
Live Update is not activated by default (I think it should be). When Live Update is activated, scan results are updated in real time as new vulnerabilities are discovered. This may have an effect on your compliance but I believe that these issues should be highlighted quickly.
In the CSI portal navigate to Configuration > Settings and check Activate Live Update. Note that this only comes into effect from this point and has no effect on historical data or reporting.
Also check the box to choose your email recipients for notifications.
Now we will connect CSI to our WSUS/Configuration Manager environment. Navigate to Patching > Configuration > WSUS/System Center.
See that it is currently "disconnected". Of course it is. We have to configure the integration. See the error "the Secunia CSI plugin for Microsoft WSUS could not be loaded". There are some prerequisites:
- .Net Framework 4.5
- Visual C++ Runtime 2012
- WSUS console
We can see at a glance what is missing - Visual C Runtime 2012. Click on the link to download the required files.
Download and install Microsoft Visual C++ 2012.
Now we can access the WSUS configuration.
Side note: during the WSUS integration we will create a self-signed certificate that will be published to the certificate stores on the local server. This is not allowed by default on Windows Server 2012 R2 (it has been deprecated). You can get around this problem by creating a registry key.
Navigate to HKLM\Software\Microsoft\Update Services\Server\Setup and create a DWORD (32-bit) key.
Call the key EnableSelfSignedCertificates and set the value to 1
Now click on "Configure Upstream Server" to launch the CSI WSUS Configuration Wizard.
In step 1 enter the WSUS server name and port used.
Step 2 deals with the self-signed certificate. If you have ever implemented a System Center Updates Publisher solution you will have carried out this process manually. Secunia have done a good job in automating the process.
Click "Automatically create and install certificate"
Click OK to continue.
The certificate is created and installed in the Trusted Root Certificate Authorities and Trusted Publisher stores on the local server.
In step 3 select "Use System Center to distribute packages". The wizard will automatically a GPO that will allow SCCM/WSUS to distribute non-Microsoft packages (as with SCUP). Essentially the GPO allows you to deploy the self-signed certificate to your servers and workstations.
Select "Create Group Policy"
Click OK to create the GPO.
The GPO has been created.......
....and you can close the configuration wizard.
See that you are now "connected" to WSUS/SCCM.
This is the GPO that was automatically created.
Details of the GPO.
You should now link the GPO to the required OUs to deploy the self-signed certificate.
I've carried out all this configuration by using an IE session directly on the SCCM server. This might not always be the preferred option. Note that if you are carrying out the configuration on a desktop then the operating system of desktop and server must be part of the same family (eg Windows Server
2012 R2 and Windows 8.1).
Back to Secunia menu
The first step in a Secunia CSI deployment is to purchase the licenses (the product is licensed per node). You can contact Secunia directly or through a Managed Service Provider (MSP). Ergo Group (my employer) is the Secunia CSI MSP for Republic of Ireland. Your login details will be sent to you via email.
Connect to the CSI Portal. (You must use Internet Explorer (I'll explain this later). Also some of the functionality requires for IE to be launched as Administrator. Therefore I think it's easier just to do this each time).
https://csi7.secunia.com
Welcome to the CSI Portal.
See the navigation tabs on the portal. Some items are missing from the final solution. Where is "Patching" for example? For now we can only see cloud based items that can be configured (User management, for example). We cannot integrate with Active Directory or WSUS/SCCM at this stage.
So what is the problem? Have a look at the bottom of the IE screen. You will see a reference to the CSI Plugin. This is required to add the functionality to integrate with on premise services. Note that the CSI Plugin is only supported by Internet Explorer. If you use another browser you will be able to log in to the portal but you will not be prompted to install the plugin.
Download and install the CSI Plugin.
It's a very straightforward installation with no trick questions.
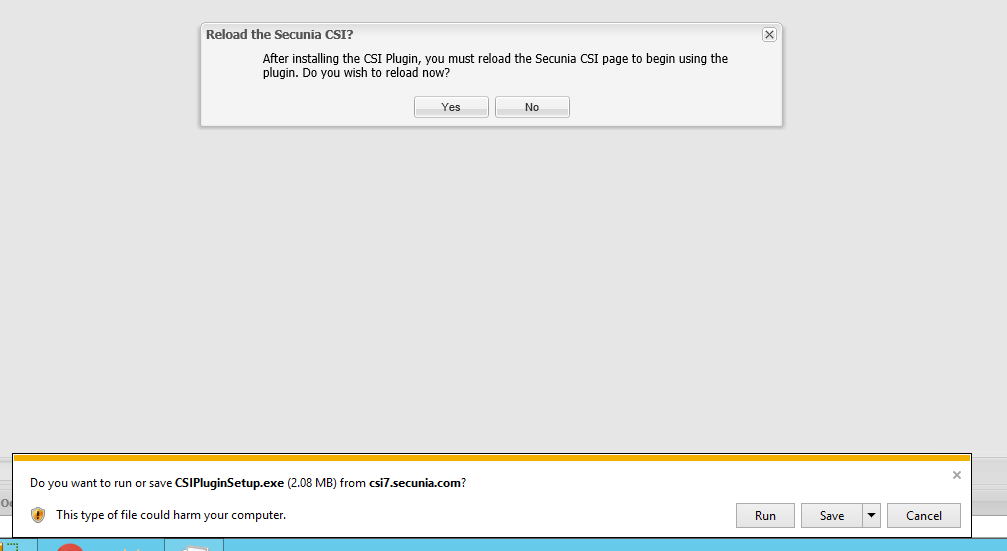
After the installation you are prompted to reload the portal page.
Now see the additional items. See "Patching". We will be doing a lot of work using this menu.
Also see where we can now integrate with Active Directory.
One final thing to note here - have a look at the bottom right of the screen and see that the portal version is 7.1. When Secunia upgrade the portal (possibly to 7.2) you will have to download and re-install the Plugin for 7.2. Don't worry though. You won't have to redo any configuration.
Next we will carry out the initial configuration. Until then.......